วันพุธที่ 22 พฤศจิกายน พ.ศ. 2566
วันจันทร์ที่ 13 พฤศจิกายน พ.ศ. 2566
SSL-CERT_Apache-Infor-wms
1. Edit file httpd-ssl.conf and config like a picture below

2. Insert line like a picture below

3. Copy ssl file to folder ssl

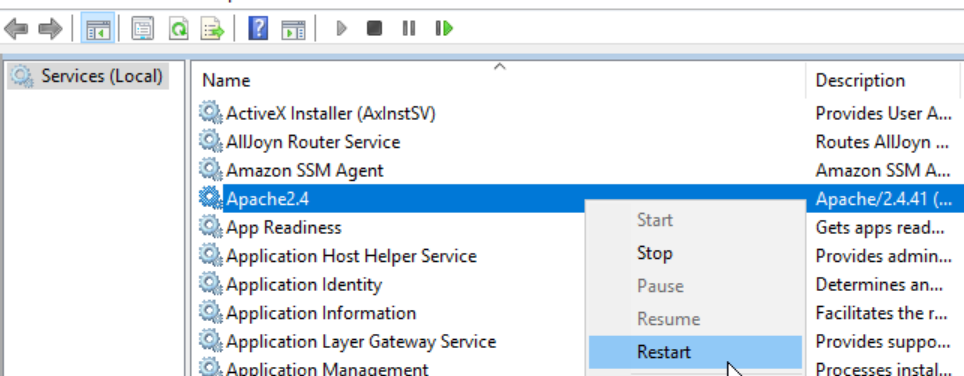
5. Run services.msc and restart apache2.4
SSL-CERT_Apache-Linux
1.Find apache ssl location
SSL-CERT_Apache-xampp
1. Click stop

2. Edit config
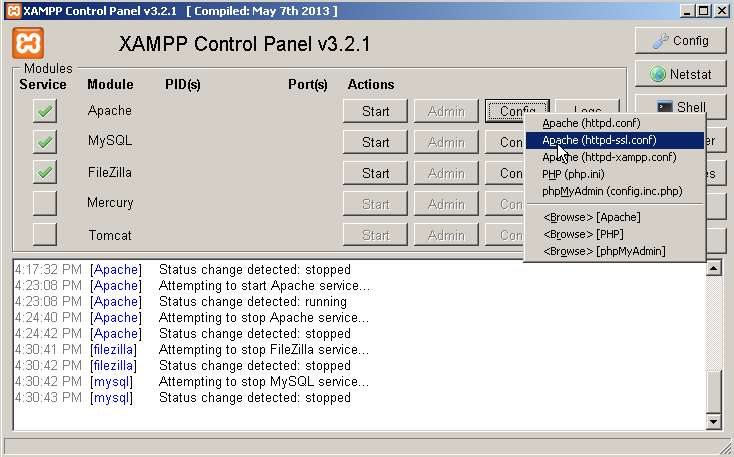
3. enable config

วันพุธที่ 8 พฤศจิกายน พ.ศ. 2566
SSL-Certificate_Windows 2003 (32bit)
1. Run 'mmc'


วันจันทร์ที่ 6 พฤศจิกายน พ.ศ. 2566
SSL-Certificate-Create
How to import
6. K2
7. citibank-IR
How to create and convert to apache format
1. Create the .pfx file using https://www.sslshopper.com/ssl-converter.html


วันอาทิตย์ที่ 22 ตุลาคม พ.ศ. 2566


วันพฤหัสบดีที่ 5 ตุลาคม พ.ศ. 2566
Docker
Docker
portainer
docker volume ls
docker volume rm [volume_name]
docker images
docker image rm
docker volume create portainer_data
docker run -d -p 8000:8000 -p 9443:9443 --name portainer --restart=always -v /var/run/docker.sock:/var/run/docker.sock -v portainer_data:/data portainer/portainer-ce:latest
Guacamole
CREATE USER 'guacadmin'@'localhost' IDENTIFIED BY 'password';
GRANT SELECT,INSERT,UPDATE,DELETE ON guacdb.* TO 'guacdmin'@'localhost';
วันจันทร์ที่ 11 กันยายน พ.ศ. 2566
SAP-TCODE
#Client
SAP* - 000,001 and 066
DDIC - 000 and 001
EARLYWATCH - 066
SCC4 - Client creation / maintenance
SCC5 - Client deletion
SCCL - local client copy
SCC9 - Remote client copy ECC DEV1 000 , ECC DEV2 800
SU01 - single user
SU10 - Bulk user
EWZ5 - Mass user lock
SUMM - user measurement
SM20 - user t-code log
RZ10 - Parameter session idle time, SMTP
RZ11 - Parameter (login/fails_to_session_end) Limit Logon Attempts
-role maximum of 14000
-profiles in a role is 312
-object in a role is 170
#Authorization
SU21 - Maintain Authorization Object
SU24 - Add Authorization Object
SU53 - Check fails / SU56 find
PFCG - maintain roles
SE93 - Create new t-code
#Background Jobs
SM36 - Create, Schedule, Reschedule
SM37 - Monitor a Background Job
RSBTCDEL2 - Delete a Background Job
STMS - Transport
#System
ST02 - Buffer and swap monitoring
ST06 - Monitoring of OS Resources CPU,RAM,HARD DISK
ST04 - Monitoring of Database
ST03 - Analysis of workload
USMM - System measurement (Audit)
smlg - define logon groups
SCU0 - compare
#Table (SE16)
T000 - A list of defined clients
TSTCT - Display transaction code text
USR02 - User IDs and passwords
USR40 - Store pattern of words which cannot be used as a password
TADIR - Object directory entries
TDEVC - Development classes and packages
E070 - Change request object lists
DEVACCESS - list of the users with development access
AGR_AGRS - Determining the single role that is assigned to a given composite role
Basic T-Code
SM04/AL08 − User log-in List
SM51 − Display Application Server
SM37 − Background Job Overview
SM50/SM66 − Manage Work Processes
SM12 − Mange Lock Entries
PFCG − Maintain Roles
SM13 − Manage Update Records
SM21 − Analyze System Log
SM02 − Send System Messages
วันจันทร์ที่ 21 สิงหาคม พ.ศ. 2566
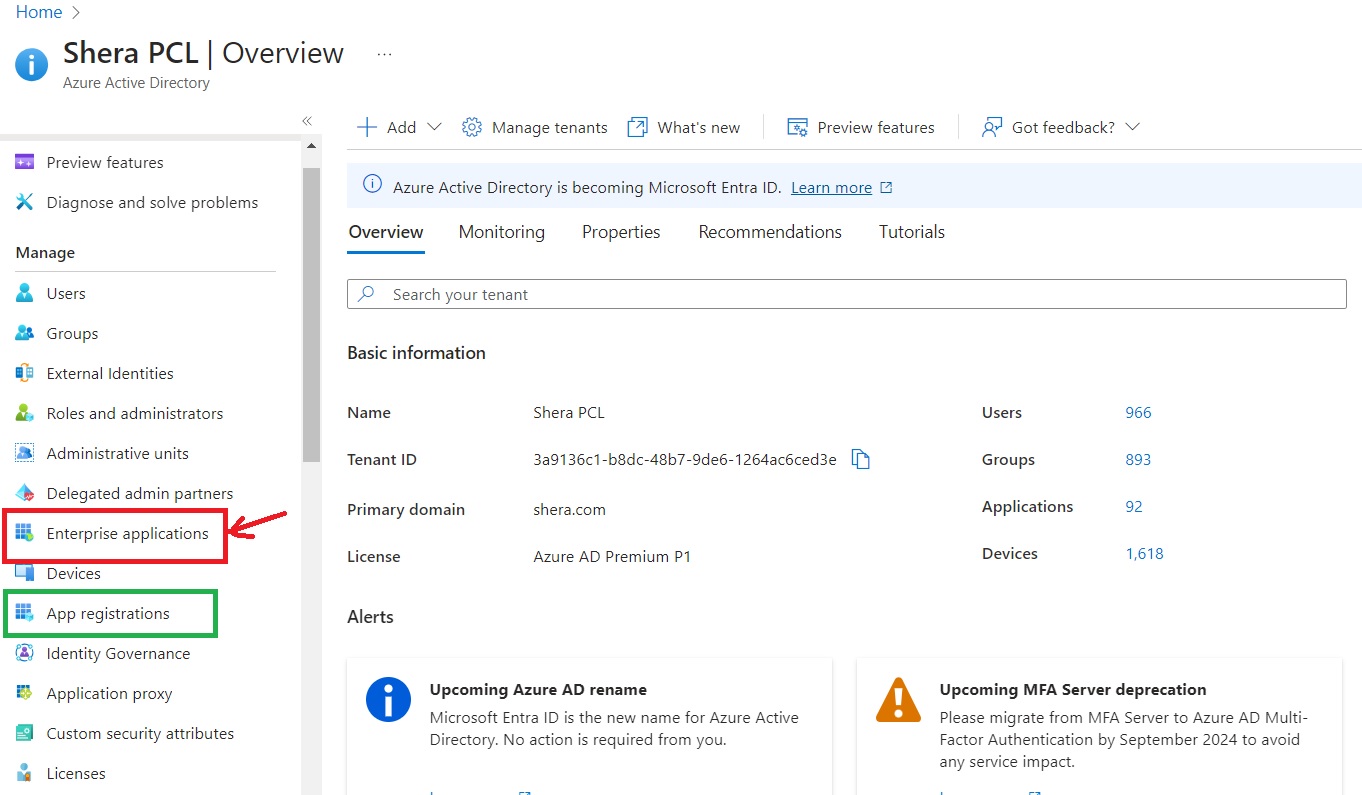
Azure SSO App registration
1. Registration App go to Azure AD for full feature
2. Enter name

3. Select registration app